Debian Squeeze on iBook G4
Hello, i recently wanted to test how the Debian PowerPC Port works on iBook series notebooks. Yeah, it works very nicely! But before doing it right, lets investigate how to turn your iBook G4 to fully functional Debian GNU/Linux system. First of all you will need to download NetInstall ISO from HERE. Burn it to CD insert it to your Mac, reboot, and and hold down "C" key until Debian installer boots.
The next few screens are pretty self-explanatary, asking for language and keyboard settings. Just pay attention to the navigation instructions on the bottom of the page showing how to use the tab, spacebar, and enter keys.
Now the installer will ask you for your host name. This is what you want your computer to be called, in my case, "iBook" Then it asks for a domain name, I left it blank. Then it asks for a root password, your full name, username, and user password. Remember your passwords! Then after you choose your time zone, you are taken to the real meat of the installer--the Debian partitioner.
If you're installing a Debian-only system and not dual booting, you can use Guided Partitioning here. But if you're dual booting OS 9 or OS X, you'll want to select Manual Partitioning. When you see the partition table, use the arrow keys to navigate down to your Debian partition and press return. Then choose "Delete the partition." When you return to the partition table, it should say "Free Space" for the Debian partition. Now you will create the bootloader, swap, and root partitions.
Navigate down to Free Space, press return, then select "Create a new partition." Enter 820 KB for the size, to be created at the beginning of the partition. Then name it "Apple_Bootstrap." Under "Use as:" select "NewWorld boot partition," then set the bootable flag to "On." Then select "Done setting up the partition" and you will see the bootloader partition in your new partition table.
Next, create a swap partition following basically the same procedure. Go down to Free Space, create a new partition, enter the size (double your RAM size, in my case 1280mb because i have 640mb ram), at the beginning of the partition, but under "Use as:" select "swap area." Then select "Done setting up the partition" and see the new partition table.
Finally, begin the same procedure for making your root partition. Go down to Free Space, create new, and for size use the maximum remaining space. Name it something like "Debian." Under "Use as:" select "Ext4 journaling file system." For mount point, choose "/ - the root file system." For mount options, select "noatime" by ticking it with the spacebar. Change the bootable flag to "On," and then you can select "Done setting up the partition" and see your completed partition table. At this point, if you see a few kilobytes or megabytes of free space at the end, just ignore it.
Now you can finally choose "Finish partitioning and write changes to disk." Use the tab key to select yes and press return.
This is when the actual installation begins. Here it will install the base system and, after a bit, ask you to enter your country and to select an archive mirror. When it asked for proxy info, I left it blank since I'm not using one. The next question to come up is "Participate in package usage survey?" Answer yes because it's always good to let the mothership know there are PowerPC users out there.
On a subsequent page you will be asked to choose additional software to install. Here you'll notice "Debian desktop environment" is checked by default. This will install a full Gnome desktop. Which you could totally do. I'm not judging you, really. But if you want to give LXDE a spin without all the Gnome overhead, you'll want to uncheck this box by pressing the spacebar. You can always install Gnome later if you insist. Just make sure "Standard system utilities," and "Laptop" are checked, then use the tab key to navigate to "Continue" and press return.
When the installation finally completes, the CD will eject and you can press return to boot into your new system.
By now you should be booted into your new system. You've past the startup dialogues and are staring at a terminal prompt, yourhostname login: _
Here you want to type root, then enter your root password. Now you're logged in as root with all the superpowers that comes with it. We logged in as root because in order to get administrative access through your user account, you have to install the sudo package first. So at the command prompt, type:
# apt-get install install sudo
Once it's done installing, edit file /etc/sudoers with nano or other text editor. Navigate down to the line:
root ALL=(ALL:ALL) ALL
and just below it add the line:
yourusername ALL=(ALL:ALL) ALL
But if you're still here, now's the time to install your GUI. I said this would be an LXDE which is lightweight, so the downloading shouldn't take too long. At a terminal prompt, type on one line:
# apt-get install xorg lxde gnome-themes gnome-themes-extras gtk2-engines-murrine murrine-themes otf-freefont
Let's break this down. xorg is required as your X window server, otf-freefont is a font package that looks more OS X-ish (also, you could install gnome-core here instead of lxappearance, and this will give you some useful GUI utilities for managing your desktop, but it's a massive download that comes with a lot of overhead and other applications you may not want).
First you want to edit your apt-sources list by typing:
# nano /etc/apt/sources.list
This is your package source list. You want to add non-free repositories by adding contrib and non-free to each of the entries like this (single line):
deb http://ftp.us.debian.org/debian/ squeeze main contrib non-free
Make sure they all end in main contrib non-free. Then save changes and exit, and run:
# apt-get update
to update the repositories (don't forget that last step).
Next, if you have a first-generation Airport card you need to install nonfree firmware, and you also may want to add the Microsoft fonts installer for fonts many web pages use (single line):
# apt-get install firmware-linux-nonfree ttf-mscorefonts-installer
The mscorefonts installer will auto-launch and take a minute to install all the fonts.
Now we can install some applications. I'm going to install just a basic set by typing on one line:
# apt-get install iceweasel transmission audacious vlc mplayer abiword gimp feh epdfview default-jre icedtea6-plugin
Iceweasel is Firefox rebranded, Transmission is for BitTorrent, Audacious is a really cool lightweight music player, VLC and mplayer are video players. Abiword for word processing, GIMP, feh, and EpdfView for graphics and pdfs, default-jre installs open-source java, and icedtea6-plugin is a java web plug-in.
Once the installing is done, there's one more thing you need to do before entering the GUI. If you're using a one button mouse or a one button laptop, using LXDE without middle and right click will be a highly unpleasant experience--as in you literally won't be able to do anything except stare at the screen and play with your cursor. So to enable middle and right click, run:
# nano /etc/sysctl.conf
and add the following three lines at the end (and note there's no forward slash before "dev"):
dev/mac_hid/mouse_button_emulation = 1
dev/mac_hid/mouse_button2_keycode = 97
dev/mac_hid/mouse_button3_keycode = 100
This will make fn + ctl and fn + alt your middle and right click keys. Or if you prefer the enter key (the one next to the spacebar on a laptop) to be right click, replace 100 with 96. Desktop users will want F11 and F12, so replace 97 with 87 and 100 with 88 (desktop users only because F12 may conflict with a laptop's eject key). When you've saved changes and exited, run:
# sysctl -p /etc/sysctl.conf
and you should see confirmation of your new keycode. Just make sure you don't have mouseemu installed because it may conflict with this. If you do, do a apt-get remove mouseemu. Unless you want to use mouseemu instead.
Now you're all set to enter your GUI. Type /etc/init.d/gdm start to launch X enter your username/password to login.
This is LXDE. Run lxterminal for menu > accesoaries. To monitor your network traffic, run:
To check your battery status, run:
# cat /proc/pmu/battery_0
Nerd stuff aside, now let's move on to configuring other stuff.
Sound
If you don't have sound working out of the box, make sure snd-powermac is in your /etc/modules file. I had to add it manually. But I still had no sound. My next step was:
# apt-get install alsa-base alsa-utils
so from those packages I could run alsamixer from a terminal window. Once in alsamixer, I needed to turn up the master volume and tick the "m" key so that the "MM" below the Master bar changes to "00". Press esc to exit and finally I had sound.
Graphics Acceleration
iBook G4 have a Radeon card, this card needs proprietary firmware from the firmware-linux-nonfree package, so make sure you installed it. To check if you have graphics acceleration, install mesa-utils and run:
glxinfo | grep render
If you see "OpenGL Render String: Software Rasterizer" you're not getting 3D. First, turn off the Radeon framebuffer with the yaboot parameter video=radeonfb:off (at the second yaboot screen, press tab and then type Linux and whatever parameters you are adding). You might also have to turn off the open firmware framebuffer and force PCI mode, like this (single line):
Linux video=radeonfb:off video=offb:off radeon.agpmode=-1
This may disable suspend on your laptop as I've been told KMS (kernel modesetting) doesn't support suspend on PowerPC "yet."
If this succeeds, you can make it permanent by adding append="video=radeonfb:off" (and any other parameters inside the quotes and separated by spaces) to your /etc/yaboot.conf file under the section "image=/boot/vmlinux" and tabbed in with the other sub-entries. Then run ybin -v after saving changes.
If, however, you didn't succeed or worse got a black screen, you can downgrade to Mesa-7.1.1 and turn off KMS (Mesa 8 doesn't support non-KMS acceleration). Rage 128 users will also want to downgrade as Mesa 8 dropped support for those cards.
Once the downgrade is complete, Radeon users can turn off KMS with the yaboot parameter radeon.modeset=0 or by creating the file /etc/modprobe.d/radeon-kms.conf and adding the single line:
options radeon modeset=0
Once you have 3D, you can improve performance a bit by playing with xorg.conf options. First you need to generate a xorg.conf file by going into a console with ctl + alt + F1, logging in, and then:
# /etc/init.d/gdm stop
This will terminate your X session. Then type:
# Xorg -configure
and then copy the resulting file to its proper location with:
# ~/xorg.conf.new /etc/X11/xorg.conf
Now you can edit your xorg.conf file. I added the following options under the "Device" section:
Option "AGPFastWrite" "True"
Option "EnablePageFlip" "True"
Then I saved, and when I restarted X with /etc/init.d/gdm start, I had a decent bump in my glxgears count. One more thing, try installing and launching driconf (install it by running apt-get install driconf) and click yes where it says "Use HyperZ to boost performance." You should see another glxgears bump.
Gamma
You may find the gamma setting on your new Linux display a little too bright. If so, you can change it by running xgamma to test different levels, like this:
xgamma -gamma 0.9
This will bring your gamma down one-tenth of a point from the default 1.0. To make it brighter than the default, simply enter a value above 1. When you find a setting you're happy with, you can make it permanent by editing your xorg.conf file and adding the option Gamma 0.9 (my preferred setting) under the "Monitor" section. You can confirm the xorg modification worked after restarting X by running xgamma with no arguments, and it will display your current gamma settings.
Wireless
Now let's tackle wireless. This actually should be easy. If you haven't already installed firmware-linux-nonfree, you need it for WPA support on first-generation Airport cards (Airport Extreme users will want to look up firmware-b43-installer). Then:
# apt-get install wireless-tools wicd
then look up your wireless interface with:
# iwconfig
It'll probably be eth1 or eth0. Now run:
# wicd-client -n
In preferences, add eth1 or eth0 to "Wireless interface," and you can add your DNS servers, too, if you're using OpenDNS or Google's. Click OK, then find your network on the list (refresh if you don't see it), check the "Automatically connect to this network" box, click the Properties button, check the "Use Encryption" box, choose WPA 1/2 (Passphrase)--please say you're not using WEP--and enter your password. Click OK and you should connect. One final note, the original Airport cards only support WPA networks but not WPA2.
Hotkeys
On laptops, there's the matter of getting hotkeys for brightness, sound volume, and eject to work. Out of the box. You'll want to use pommed:
# apt-get install pommed
You can also edit config file:
# nano /etc/pommed.conf
If you read it, it should mostly make sense. Now the hotkeys should work.
Fstab
Now let's edit our fstab file to auto-mount our Mac partitions on startup. First you need to create mount points like this:
# mkdir /mnt/MacOS
Command creates directory in the /mnt directory called MacOS. You can name yours whatever you want, but this is what I have. Then open your fstab file with:
# nano /etc/fstab
and add new line at the end, for each partition you want to mount. In my case, this:
/dev/sda5 /mnt/MacOS hfsplus defaults 0 0
Put tabs between all the entries, not spaces. You can look up your own partition numbers by running mac-fdisk -l (that's l for list). They're either going to be /dev/hdaN or /dev/sdaN.
Yaboot
To configure boot options and set which system is the default, you need to edit this file:
# nano /etc/yaboot.conf
Find the main section with options like "timeout" and "enablecdboot" and add the line macos=/dev/sdaN if you're also booting OS 9, and macosx=/dev/sdaN if you're booting OS X (where N is your partition number, which again can be found with mac-fdisk -l). Subsequently, these options will appear along with Linux at boot time. To set the default OS, add the line defaultos=macosx or defaultos=macos. If you add no line, yaboot automatically defaults to Linux. And about timeout, if it's too long you can change the value where increments of 10 equal one second. Finally save the file, and this is important, anytime you make changes to your yaboot.conf you must run:
# ybin -v
for the changes to stick. Run that and you're done.
CPU Frequency Scaling
You need to install powernowd for this power-saving feature. All the defaults worked for me, but you can edit /etc/default/powernowd to customize.
Playing DVDs
If you want to play commercial DVDs that are copy protected, you need to install libdvdcss2 from the Deb-Multimedia Repository. So first, add the Multimedia repository to your sources list with:
# nano /etc/apt/sources.list
and add the single line:
deb http://www.deb-multimedia.org squeeze main non-free
# apt-get update
You may notice a NO_PUBKEY warning, because you're missing the mutlimedia keyring, so:
# apt-get install deb-multimedia-keyring
and then:
# apt-get install libdvdcss2
Ignore the scary language about untrusted packages and complete the install. Afterward, I just want to stick with official Debian releases for my multimedia applications and don't want to get caught in dependency hell between Deb-Multimedia repositories and official repositories, so I'm going to comment out (add a "#" sign at the beginning of the line) the Deb-Multimedia repository in my sources.list and apt-get update again.
Shadows
Want shadows around your windows and menus? You need xcompmgr:
# apt-get install xcompmgr
and then add the following lines at the end of your /etc/X11/xorg.conf file:
Section "Extensions"
Option "Composite" "Enable"
EndSection
Put a tab before "Option," which html won't let me do. To test shadows, in a terminal enter:
xcompmgr -cC
and if you want to stop the process (or any process in the terminal, for that matter) press ctl + c. There are more extensive tutorials around with many more settings, so feel free to experiment.
Autostart
In order to have your xcompmgr settings (and any other items) autostart on boot you must add them to an autostart file. LXDE autostart folder is in ~/.config/autostart/. Autostart files in this directory should look like this one (we will create "xcomposition.desktop" file):
# Begin
[Desktop Entry]
Name=xcomposition
Exec=/usr/bin/xcompmgr -cCfFs
Terminal=false
Type=Application
Categories=
OnlyShowIn=GNOME;LXDE;
# End
Clear Caches
One last thing to do, if you have limited disk space, is to clear your apt cache. All .deb packages you download are stored there enabling you to reinstall something without re-downloading it, but they're not essential so you can clear the cache with:
# apt-get clean
Thats all for now but in the future i will promise to write much more about Debian PPC Port.
Have a nice time ;-)
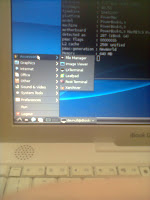
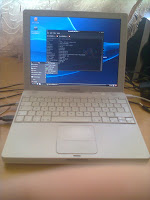
btw some photos:


How fast or slow is your Debian on iBook compared to OS X? I guess Debian is fast but still; are you able to see YouTube-videos?
ReplyDeleteI've not tried Youtube, but it works very fast. :-)
ReplyDeleteThis is the best article ever. I just recently bought an ibook on ebay, and linux seemed like the most practical way to make use of it. :-)
ReplyDelete