Anet a8 Plus BlTouch

Hey, sup!
The top picture speaks for itself. Today we will talk about how to correctly install BlTouch for Anet A8 Plus 3D Printer. BlTouch is the sensor designed for auto leveling the bed of the 3D printer. There are a lot of information about Anet A8 (without plus) printer on the net but it's hard to find information for its newest model (plus). So to save you couple of hours time in researching how to correctly connect the wires, i will show the proof of concept how to do it in correct way.
Necessary stuff:
- Anet A8 Plus 3D printer
- BlTouch or 3Dtouch (the wiring of these are the same)
- Printed handler for BlTouch use "BL Touch Mount - direct mounting v2.stl"
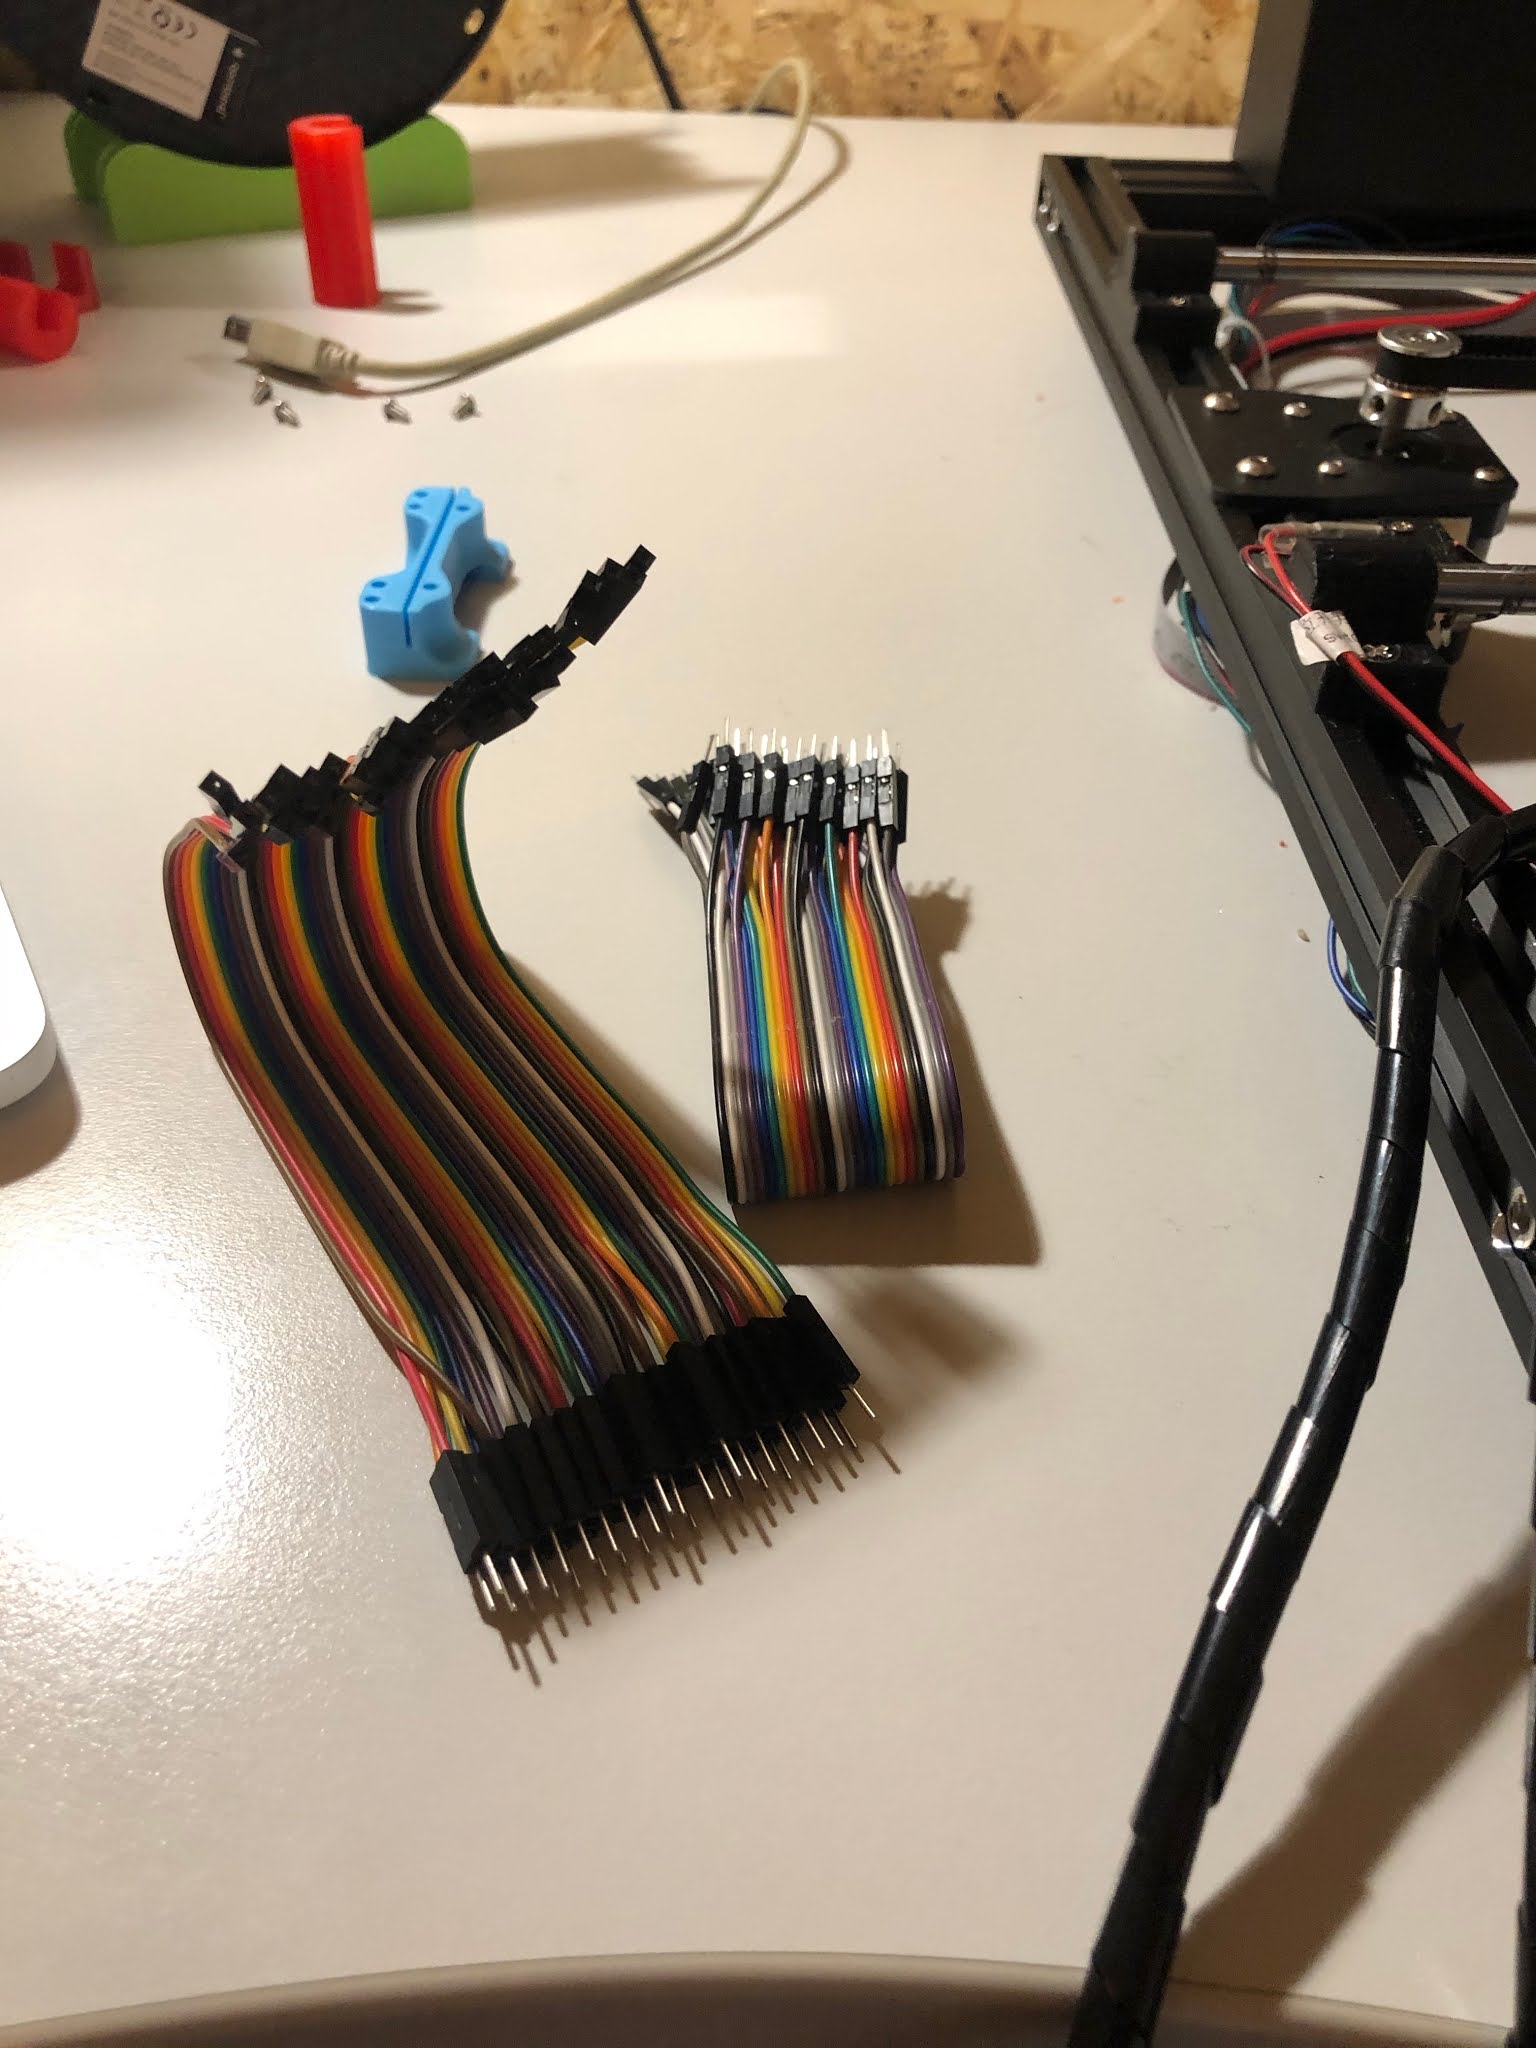
- 20 prototyping jumper male-female gpio wires from RaspberryPI projects
- USB Printer cable
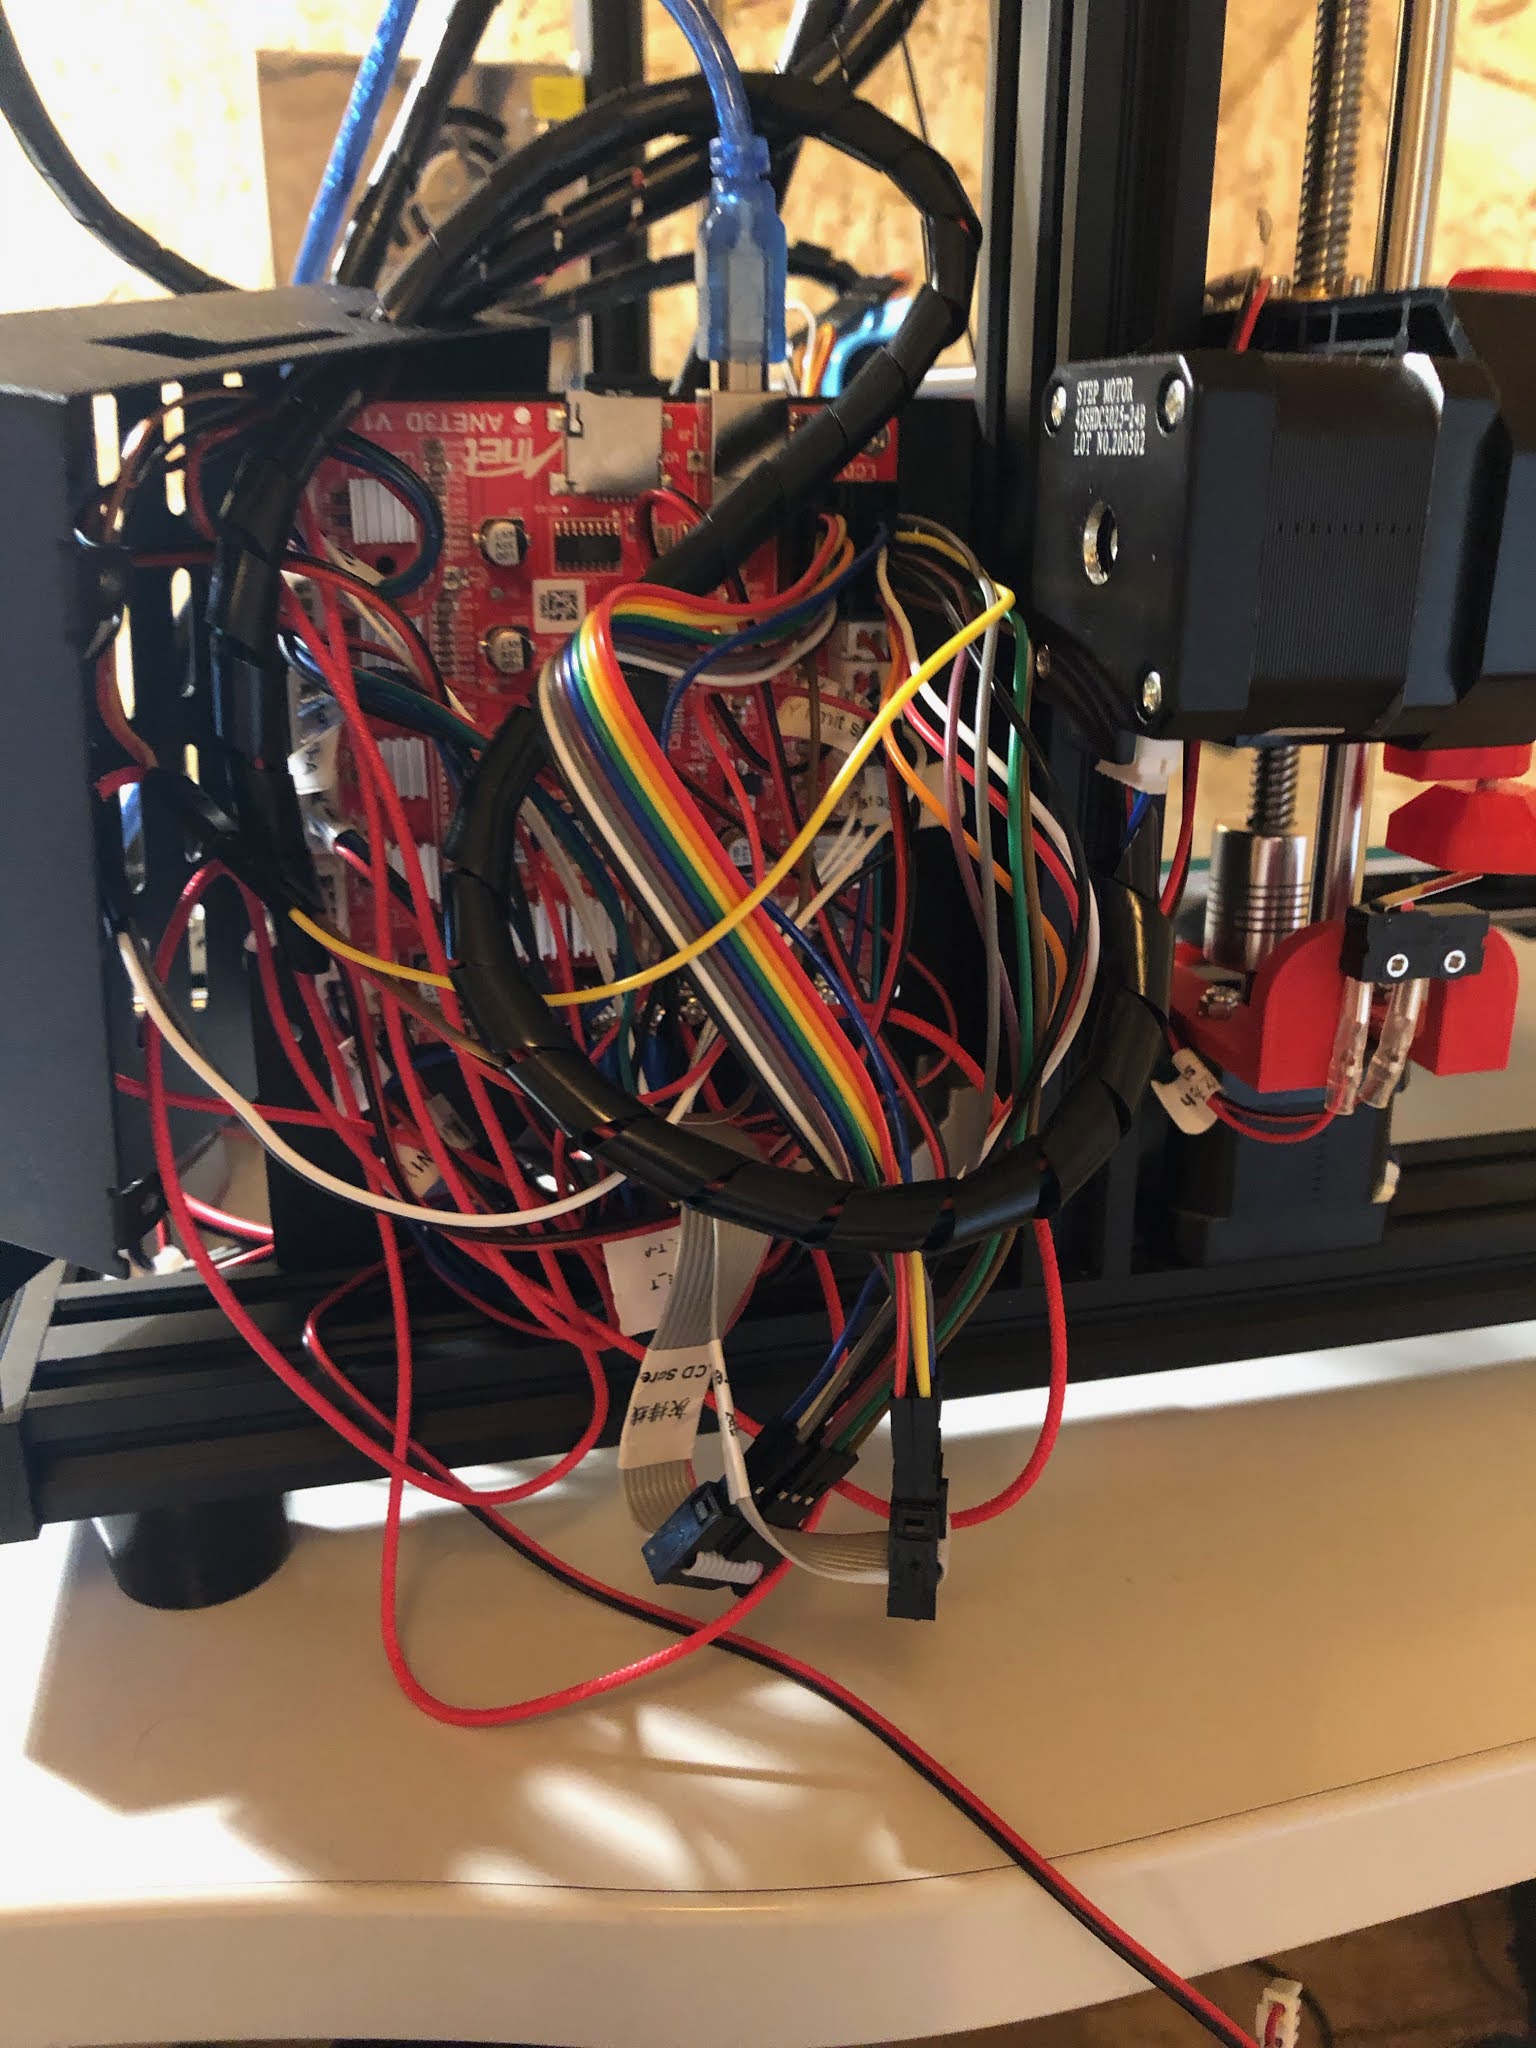
Hardware setup

Wiring


Software setup
Download the newest Marlin 2.x from https://marlinfw.org/meta/download/
Download the printer definitionus from https://github.com/SkyNet3D/anet-board
Download Arduino studio from https://www.arduino.cc/en/software
Now insert the definitions into the place
mv anet-board/hardware/anet /Applications/Arduino.app/Contents/Java/hardware
Open Arduino IDE in Meniu Tools > Boards > Marlin AVR Boards should show up the menu entries Anet v1.0 and Anet v1.0 (Optiboot)
Now we should to download the definitions for the marlin
cd marlin-src/config
cat README.md (url to the definitions)
wget <url to definitions>
unzip release*.zip
cd Configurations-release-*
mv config/examples/Anet/A8plus/* ../../Marlin
Open Marlin/marlin.ino with Arduino IDE
Click Sketch -> Include Library, Click Manage libraries
1. Download and Install u8glib by oliver
* Click Sketch -> Include Library, Click Manage libraries
* Search U8glib – U8Glib by oliver,
* Click Install
* Click Close
2. Click Tools -> Board, Select Anet 1.0 (Optiboot)
3. Click Port, Select the assigned COM port
Marlin configuration
Search for these lines and comment them with //
//#define ANET_FULL_GRAPHICS_LCD
//#define ENDSTOP_INTERRUPTS_FEATURE
//#define MIN_SOFTWARE_ENDSTOP_Z
// #define SDSUPPORT
Search for these lines and uncomment/adjust them:
#define CR10_STOCKDISPLAY
#define BLTOUCH
#define NOZZLE_TO_PROBE_OFFSET { 0, 52, 0 }
#define PROBING_MARGIN 30
#define AUTO_BED_LEVELING_BILINEAR
#define ENABLE_LEVELING_FADE_HEIGHT
#define EXTRAPOLATE_BEYOND_GRID
#define LCD_BED_LEVELING
#define Z_SAFE_HOMING
In Configuration_adv.h uncomment these lines
#define Z_SAFE_HOMING
#define BLTOUCH_FORCE_SW_MODE
If you are using BlTouch v3.1 you can also try enabling #define BLTOUCH_SET_5V_MODE
As you see we had to disable SD card support, therefore you must be running OctoPrint already. Because without SD card and OctoPrint support you can only directly print from computer using usb cable. Search internet how to make OctoPrint to work if you haven't already.
Now press upload. Updated software should reboot the board, you can disconnect it from your computer and normally power it on. If you see only blank screen something must be wrong, you should reconnect original cables and try turning it on, if it works that means that you have bad wiring. If your printer does not work or show blank screen on all ways you tried, it seems that you have corrupted BootLoader on the board. Without USBasp you will not be able to fix it.

No comments: